Thursday, January 29, 2009

How To Set Up A Sky Dome

Here's a link to a concise tutorial on how to set up a sky dome from DezFX. Merci.
Key points:
1. Using a surface shader so you don't have to light your dome.
2. He uses a nurbs sphere, but a poly sphere is okay too. ("isoparm" in his step 3 is just the center line of the sphere for those of you NURBS newbs.)
3. You'll need a 2D sky image to use as a texture map. Hmmm. Google + "Sky Texture" FTW.
Higher res textures will give you more flexibility. Photoshop is your friend for getting the proper color and feel for your sky.
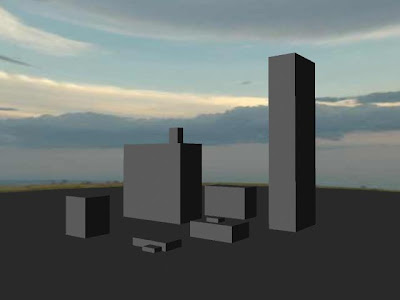
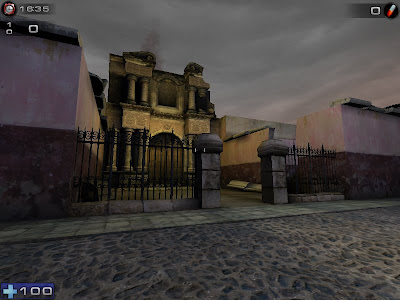
4. Here's an example of the technique in action by that bad-ass Alex Munn. Check out Alex's site. His stuff is splendid and gives such a clear example of how design, composition, modeling, textures, and lighting come together to create an environment.
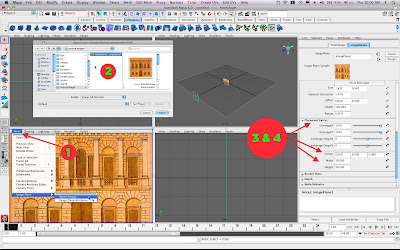
How To Set Up An Image Plane Template In Maya


0. Put your image in your project's sourceimages folder.
1. In the front viewport menu, choose View > Image Plane > Import Image.
2. Choose your image. If your project is correctly set up, it should jump to the right directory.
3. You can scale the image plane by setting the Width and Height attributes in the Attribute Editor under Placement Extras.
4. To adjust the location of the image plane (up and down, side to side) change the Center attributes in the Attribute Editor under Placement Extras.
5. Create a new layer in the Layers palette, then select Window > Outliner, hit the "+" next to the front camera, select "front shape." Now right-click the new layer in the layer palette and choose "add selected objects." Now you can turn your image planes on and off.
6. To add another image plane for the side and/or top views, repeat the above steps in a different viewport menu.
7. If you've selected something else, and need to get the Image Plane attributes back, just select View > Image Plane > Image Plane Attributes > Image Plane 1 from the front viewport.

Thursday, January 22, 2009

UV Mapping Thursday

Not a catchy name, but here we are. Here is a .pdf file on UV mapping in Maya for you to cut your teeth on. It's Dio-intensive, so watch out.

Tuesday, January 20, 2009

Environment Design

Self-portrait as Tourgot, Level 56 Undead Rogue

1. We'll critique your block cities and writing and look at your source research.
2. Check out this job offer at Blizzard for a 3D environment artist and we'll discuss it.
3. We'll discuss lighting design and camera composition.
4. We'll introduce ourselves to the material editor.
5. A bit of architectural modeling

Thursday
1. UV editor and creating materials in Photoshop.
2. More on lighting including environments and skies.

Thursday, January 15, 2009

Assignment 2 - More Blox

1. Write a description of your block set to accompany your images. What is it? Where is it? Who are the inhabitants? What's the story behind it, etc.

2. In a new post, describe a new place that you will build. Describe the feeling it invokes, the colors, its history, what you see in the scene, time of day, lighting, etc.

3. In a new post, start posting images that will help you in building this place. Post at least 10 images by Tuesday.

4. Start blocking in the set using the almighty block method.

We'll look at your results on Tuesday, January 20

Tuesday, January 13, 2009

Mac Thang: Grab


To do screen caps on a Mac, use Grab.
Under Macintosh HD > Applications > Utilities > Grab
Hint: put Grab in your dock.

Maya Thang: Heads Up Display

Obnoxious Maya Tip Of The Day 3: HEADS UP!
Turn your Heads Up Display (HUD!) on and off by using Display > Heads Up Display > Poly Count. Keep an eye on those hidden points and faces.

Maya Thang: Duplicate


Maya Thang 2: DUPLICATE
The command-D shortcut is awfully handy. Just make sure that you check your Duplicate options before you start doing it! The Duplicate options are where you'll set up your mirror instance when we get into organic modeling.

Maya Thang: Keep Faces Together


Maya Thang: KEEP FACES TOGETHER
To turn this extrude option on and off, go to Polygons > Tool Options > Keep Faces Together

Assignment 1: BlockTown


Block out! Create a city made only of blocks and other primitives. You can extrude if you must, but keep the detail simple. This exercise is more about layout and composition than about modeling details.

Post some screen caps and a render of your city by Thursday, January 15. The goal of this assignment is to make something that "looks cool," as we say in the academic community.

Thursday, January 8, 2009

3D Bloggin' Homework


1. Post a render or two.
2. Track down some nice examples of clean wire meshes. Post 'em! Here's an example of a really elegant mesh by John Doublestein. Check out his excellent work at John Doublestein.com. He has a very nice technical director portfolio as well. Go to his site and click through to his flatbook.
3. Find a polygon modeling tutorial or two. Post.
4. Download the Maya PLE and practice all the stuff we worked on this week
5. Add your classmates' blogs to your blog in a sidebar gadget.

Wednesday, January 7, 2009

CG Society


Check out the forums at CGSociety. This is a good place to stay up on the latest developments in the 3D universe. The Maya forum may also come in handy for you. It has for me.

Tuesday, January 6, 2009

Welcome Evil-doers


Let's post our Blogues here, people. Get to it.