Monday, May 12, 2014

Let's make a movie!

Ladislaw Starewicz on set!
You heard me right, folks. Let's do this.
  • Script and storyboards and rough animatic due on Wednesday, May 14.
  • Revised animatic (with sound and some 3D block-ins) due Monday, May 19. Also, show some animation tests...
Each team member should post the above to their separate blogz...


Wednesday, May 7, 2014

More Movies and Your Final Project

Some more movies to look at!


The Tale of How from Shy the Sun on Vimeo.


The Mysterious Geographical Explorations of Jasper Morello from Rupert Gibb on Vimeo.


The Tale of How: The Making of from Shy the Sun on Vimeo.

Be thinking about scripts and teams for Monday! If you have a group you want to work with, let me know, just be receptive to taking on a new crew member or two if I ask. If you don't have a particular group or an idea, that is fine! I will place you on a team. Just let me know the score by Monday. Have a great weekend!!!

Monday, May 5, 2014

Biped Bonanza

Here are some full biped rigs to play with! Click the images to download!


Who will win? Pick a fave. Pit them against each other. Have them team up on poor Lt. Dan. Go crazy.

I'd recommend you check out the work of the wonderful David O'Reilly. The crazy sucker done made his External World rigs available for free!

Also, if you're into exploring the unknown, head over to Creative Crash and check out their rig offerings!

Animate a shot! Block in due Wednesday, May 7.
Finished work due Monday, May, 12...

Tuesday, April 29, 2014

Some Cool Thangs

Very nice little 3D illustration of the 12 Principles of Animation via Jennifer Harlow...

Ian Whitehouse also found a very swell demo of the 3D animation process from storyboard/animatic to block-in to finished render...

Wednesday, April 23, 2014

Walkin'

We'll take a look at these on Monday, April 28

Wednesday, April 16, 2014

3D Animation Project 3: Oberleutnant Dan

Behold, your next rig-- Lt. Dan! This time we've got legs and feet. . . and an optional tail. This time, we're doing walk and run cycles. Oh yes. Click here to download the Lieutenant Dan rig.
Lt. Dan and the bouncing ball rig were designed and built by Matt Ornstein! Props to him, I say!

Here's a 5 minute Miles video introducing the Lt. Dan rig:


Here's the link to the youtube page, if the embed video is lame.

For Monday, April 21 put Lt. Dan through some basic jumps. We'll start in on walks and runs on Wednesday, April 23.

Monday, April 7, 2014

3D Animation Project 2: Dualin' Ballz


SOU alum Steve Hammond shows how to get it done!

Take the ball rig, make a prop or two, and make an animation!
To ponder:

  • Beginning, middle, end. 
  • Character, deliberate action.
  • Staging
  • Poses... pose to pose with quick transitions
  • Hold Keys
  • Moving holds vs. static holds
  • Not too much more than 5 seconds!

Rough Cut crit... Monday, April 13


Tuesday, April 1, 2014

3D Animation Project 1 ... Bouncing Ballz

Okay, here's PROJECT ONE: Create two loops of a bouncing ball.
  • Create Loop One using a basic Maya primitive sphere.
  • Create Loop Two using the Ball Rig
  • Make a blog for your work if you don't already have one. Gimme the link...
  • Render both animations (Playblast is fine) and post them to a web video service (vimeo, youtube, etc) and then yer blog. Make sure they loop at least 5 times!
  • Due by Monday, April 7.
  • To learn: Timeline, Graph Editor, Playblast, Timing, Spacing/Easing, Squash and Stretch, loop/cycles. See the previous two posts for the basics.
Here are the infamous Miles Maya intro videos that show you how to do the do. Work through these before Tuesday, and we'll pack our rags and go from there...

Loop One videos:

Loop Two videos:

And finally! Don't forget to get set up with yer free Maya download on your home computer. Make sure the version you download matches the lab version! And better yet, don't forget to send me an email about being a volunteer lab aid, because you know you want to do it. And it will be awesome. Cheerio...

Maya Animation Setup

You've got to do these things, folks!

On a mac, make sure you are using a 3-Button mouse!! Also if you are using one of those fancy mac mice with the lil' rubber ball as a scroll wheel make sure you set the preferences!!!
To do so, look at the upper left corner of your screen and click on ye olde Apple Icon Button and choose System Preferences...

Apple Icon  > System Preferences > Mouse:

In Maya, change your Menu set to Animation via the pull-down menu in the top left corner of the Maya interface:

Make sure to set your Time Slider Preferences, or your animation will not play back correctly!!

You'll want to get real cozy with the Graph Editor.
It's located under Windows > Animation Editors > Graph Editor
Remember to have the move tool (W) selected to move stuff around. Hold down shift to constrain horizontal and vertical.


Finally, use Playblast to test your animations and save them for upload to the web.


blah blah

Sunday, March 30, 2014

3D Animation Maya Timeline Reference

How to kick those keys around in the Timeline!
Turn Auto Keying on and off. Click the little key icon to the right of the timeline. Red is on, black is off.

Move a Single Key. Shift + Left Click on a key. Let go. Click and drag on the inner set of arrows to move it to its new location. When you're done, click somewhere else in the timeline to cancel out of the move/scale mode.

Move a Range of Keys. Shift + Left-click-drag a range of frames. They will turn red! Move the inner arrows to move that entire range of keys in the timeline.

Scale a Range of Keys. Shift + Left-click-drag a range of frames, as above. Yes, they will turn red! Move the outer arrows to the left to make the animation faster and move them to the right to make the animation slower. This is a very nifty way to quickly modify the timing of your animation. If you don't see the outer arrows, use the Range Slider to increase your playback range until you do! After you've adjusted your timing, if you're working on a cycle, use the handy Range Slider to adjust your playback range to fit your new timing.

Copy a Key. Right Click on a key and choose Copy from the fly-out menu.

Paste a Key. After copying a key, right click the frame into which you'd like to paste your copied keyframe. Choose Paste > Paste from the fly-out menu. Beware not to just click paste and let go. There are two pastes you have to choose. It's Maya, remember.

Change Playback Range. Enter new numbers in the inner set of boxes 'neath the timeline.

Change overall animation length. Enter new numbers in the outer set of boxes 'neath the timeline.

Delete a Key. Right-click on a key and choose Delete from the fly-out menu.

Set a Key for All Keyable Attributes.  Hit "S".

Key a Particular Attribute. Shift + W (move), Shift + E (rotate), Shift + R (scale).

To do more advanced animation editing, we'll be using The Graph Editor...
Windows>Animation Editors>Graph Editor 


Thursday, March 13, 2014

Finale

 TURTLE FISHING AND ADVENTURE WITH ALLIGATOR, from
The Naturalist on the River Amazons, 1863

Final Presentation and Critique
Tuesday, March 18, 3:30
Make it look good.
Show process, drawings, viz research, block-ins, misfires
Take us through the steps...
Extract principles, best working method...

Friday, January 17, 2014

Project 2: De Architectura

  L'Arc de Miles... oh, such majestic triumphs...

Build a building that can serve as the key element in a scene. We will be component modeling for this project, but you should still focus on the big, overall shapes that make the initial impact on the viewer. One of the key aspects to this project is modular design, that is, focusing on the key repeated elements that will make up your particular building. These elements, once developed, will be duplicated to make up most of your building. For an excellent example, make sure to check out Alex Munn's work.

For the love of all that is holy, get lots of good source material to look at. The more stuff you look at, the better your work will be. Don't just "remember" something you saw in the past... go track down several image and put them in your eye-holes.

In addition to modeling, we will also be texturing our models using UV mapping... start collecting images to help you develop your texture maps...

Useful Stuff (optional):
Hey kids! It's the render wireframe trick!
A useful link on preparing a shot for compositing.
How to turn off the ground plane in your sun/sky render...

We'll have an in-progress critique on Tuesday, January 21
Final work will be due on Tuesday, January 28.


Component Modeling:


UV Mapping 101:


UV Mapping 102:


Chack it! With this ChakerBoard texture.


0. Source material:


1. Concept and template drawn in PhotoShoppe (note proportions are different in final model):

2. Modeling in progress:
3. Wireframe finished:
4. UV mapping and textures:
5. Grind Date:

6. An example of a composite shot:

3D shot with alpha channel
+
2D image in PhotoShoppe
=
Final composite image


7. Some source material for the above shot:


Tuesday, January 7, 2014

Project 1: Blockville

PROJECT 1: BLOCKVILLE
Rock out with your blocks out!

1. Find 10 images that use scale contrast and composition to help create a sense of size and distance.  Post them to your blog with the title, "Project 1: Reference Material." Make sure you credit the artist for his/her work and provide a title, date, and a link back to the site that provided the work.

Fritz Lang's Metropolis (1927). 

How's about some Piranesi? From the Carceri (Prisons) c. 1745-50. 
These have been a big influence on just about everybody designing big, fantastical scenes with gigantic architectural scale.
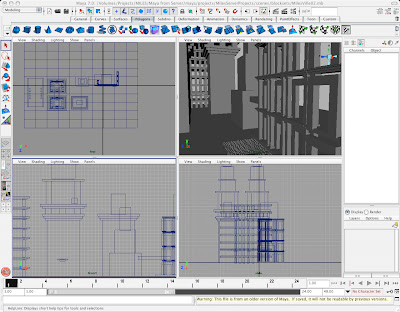
2. Choose 3 of the images and recreate them using only blocks and basic geometric primitives. Make sure you create a separate camera to maintain your shot composition. Render them out as 1000 pixel wide jpgs. Post them to your blog by Tuesday, January 14.

BLOG
You are required to keep a blog for this course and post all of your lab projects there. If you're new to bloggin', I recommend blogger.com as it's free and easy to use. If you find a service that works better for you, however, by all means, go for it. Yes, you may use a blog you have started before this class, just make sure you label your posts clearly so I don't get cranky. Once you have your blog set up, post your name and your blog's URL as a comment to this post. You must do this today, January 14. Check the comments section of this post for an example of how to do this.

PHOTO
Take a photo of your self and post it in the "about me" section of your blog by Tuesday, January 14.

READING
Each week, you'll have a reading or two and will write a reflective essay related to your project. You'll post your writing assignment to your blog along with your studio work. Your written reflection is 25% of your project grade and must be posted before class on Tuesday, January 14.
Here are your readings for the first week:
Reflective Essay Writing Tips For College Students
Interview with Joe Sanabria, Lead Artist, Fallout: New Vegas

Additional resources you may wish to consult:
cgsociety.org
conceptart.org

REFLECTIVE ESSAY:
Reflect on the process of doing your research and creating your scene. In two or three clear, precise paragraphs, try to answer at least three of the following questions: Did the interview give you any ideas on how to approach your project? Did you start with a plan and stick to it, or were there some unexpected discoveries along the way? Which do you think is your best final image? How did you decide a scene was 'finished'? Did you return to your work to edit it?  Did you have some ideas of images you wanted to work with or did you just dive into the internet and start looking? Did you learn anything from this project that will become a part of your regular creative process? What kind of emotional responses were you trying to evoke in your imagery?

GRADING
I'll be using the following rubric to assess the project. 5 categories, maximum of 5 points per category. Click the image for a larger view or click here for the .docx file.

DEMO MATERIALS:
Here is a 10 minute video to get you started with Blockville!

How To Render: