Tuesday, January 27, 2015

Project 3: Texture Time

  L'Arc de Miles... oh, such majestic triumphs...

Build a building that can serve as the key element in a scene. We will be component modeling for this project, but you should still focus on the big, overall shapes that make the initial impact on the viewer. One of the key aspects to this project is modular design, that is, focusing on the key repeated elements that will make up your particular building. These elements, once developed, will be duplicated to make up most of your building. For an excellent example, make sure to check out Alex Munn's work.

Haley's excellent tutorial on transparent materials.

For the love of all that is holy, get lots of good source material to look at. The more stuff you look at, the better your work will be. Don't just "remember" something you saw in the past... go track down several image and put them in your eye-holes.

In addition to modeling, we will also be texturing our models using UV mapping... start collecting images to help you develop your texture maps...

Useful Stuff (optional):
Hey kids! It's the render wireframe trick!
A useful link on preparing a shot for compositing.
How to turn off the ground plane in your sun/sky render...
Photoshoppe Shortcuts!

We'll have an in-progress critique on Tuesday, January 29
Final work will be due on Tuesday, February 3.

Component Modeling:


UV Mapping 101:


UV Mapping 102:


Chack it! With this ChakerBoard texture.


0. Source material:


1. Concept and template drawn in PhotoShoppe (note proportions are different in final model):

2. Modeling in progress:
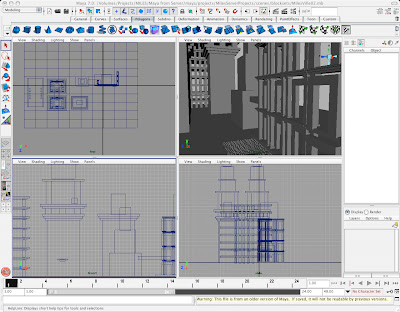
3. Wireframe finished:
4. UV mapping and textures:
5. Grind Date:

6. An example of a composite shot:

3D shot with alpha channel
+
2D image in PhotoShoppe
=
Final composite image


7. Some source material for the above shot:


Wednesday, January 14, 2015

Project 2: Blockville BuildUp


Okay, we're getting into component modeling now. Verts, edges, and faces are your new companions. Your project for Thursday, January 22 (furlough day on Tuesday, so no class) is to build out some of your scene objects in Blockville using component modeling to create some more detailed, cool elements to give your scene 6000% more bad-assery. Demonstrate this increase with three more scene renders posted to the blog. Remember, be deliberate in your choice of what to model so you get maximum visual impact out of your efforts. Do appropriate VISUAL RESEARCH and post it. I don't know much, but I do know that  you (yes, you) do not yet have a fully detailed architecture library floating about in your head.

Responsive essay. This essay should have a bit of before and after reflection. Before you get too involved in your modeling, write a bit on what emotional impact you are trying to convey in your scene and how you might achieve that effect. After your shots are getting done, reflect a bit on your use of modeling, architectural repetition, research, shot composition, and the like and how it contributed to the success/failure of your work.

Basics:
1. Right-click, hold, and drag on an object to set the component level you want to work on. This is also where you get back to object mode.

You can also use f8, f9, f10, f11 to access the different component levels. If you do this, you'll need to set up your mac hotkeys: Apple Menu>System Preferences>Keyboard> use f1 etc as standard function keys checkbox.


2. Avoid the following like the plague (because we all very consciously try to avoid the plague).
a. Non-planar faces:
The top face of this block is f***ed (i.e. non-planar)


The top face of this block is fine--it's planar.

b. Do not pull verts through faces! Ugh. Don't make me look at it:
wtf???

c. N-gons. These are polygons that have more than 3 or 4 verts. 
This is one polygon, but it has 8 vertices.

Here's the same model, properly "quad-ed out".

d. Unnecessarily complex geometry. Hello, olde-fashioned booleans.
Clean-up on isle 5!

To avoid these unfortunate types of things, we've got to learn how to add geometry to our models carefully and deliberately. The Heads Up Display (HUD) will help you keep tabs on your "poly-count" as well as give you a constant read-out on health, ammo, and special ability cooldowns. Access the hud through: Display>Heads Up Display>Poly Count


DemoTemplate. Click to enlarge, then download.


Blog Basics

1. Lots of people gave me wonky blog urls which is not entirely useful. In the "real" world, giving someone a busted link is the end times. Before you submit something, test it, then test it again. Ask your neighbor to test it for you on their device.

2. When you create a URL... for the love of the old gods and the new... YOU HAVE TO REMEMBER IT. It's basically a teeny tiny piece of marketing. Create a URL that is easy to remember, easy for others to write down, and easy to type.

3. Get in the habit of posting early and often. You are creating an impression online. If you are active, that is good. If you are not, that is less good.

4. Come up with a title that either has your name in it or that is the title of a work you are developing.

5. Seriously consider purchasing a domain name. Highly recommended for folks looking to work in the field.

Tuesday, January 6, 2015

Project 1: Blockville

PROJECT 1: BLOCKVILLE
Rock out with your blocks out!

1. Find 10 images that use scale contrast and composition to help create a sense of size and distance.  Post them to your blog with the title, "Project 1: Reference Material." Make sure you credit the artist for his/her work and provide a title, date, and a link back to the site that provided the work.

Fritz Lang's Metropolis (1927).  

How's about some Piranesi? From the Carceri (Prisons) c. 1745-50. 
These have been a big influence on just about everybody designing big, fantastical scenes with gigantic architectural scale.

2. Choose 3 of the images and recreate them using only blocks and basic geometric primitives. Make sure you create a separate camera to maintain your shot composition. Render them out as 1000 pixel wide jpgs. Post them to your blog by Tuesday, January 14.

BLOG
You are required to keep a blog for this course and post all of your lab projects there. If you're new to bloggin', I recommend blogger.com as it's free and easy to use. If you find a service that works better for you, however, by all means, go for it. Yes, you may use a blog you have started before this class, just make sure you label your posts clearly so I don't get cranky. Once you have your blog set up, post your name and your blog's URL as a comment to this post. You must do this today, January 6. Check the comments section of this post for an example of how to do this.

PHOTO
Take a photo of your self and post it in the "about me" section of your blog by today, January 6.

READING
Each week, you'll have a reading or two and will write a reflective essay related to your project. You'll post your writing assignment to your blog along with your studio work. Your written reflection is 25% of your project grade and must be posted before class on Tuesday, January 14.
Here are your readings for the first week:
Reflective Essay Writing Tips For College Students
Interview with Joe Sanabria, Lead Artist, Fallout: New Vegas

Additional resources you may wish to consult:
cgsociety.org
conceptart.org

REFLECTIVE ESSAY:
Reflect on the process of doing your research and creating your scene. In two or three clear, precise paragraphs, try to answer at least three of the following questions: Did the interview give you any ideas on how to approach your project? Did you start with a plan and stick to it, or were there some unexpected discoveries along the way? Which do you think is your best final image? How did you decide a scene was 'finished'? Did you return to your work to edit it?  Did you have some ideas of images you wanted to work with or did you just dive into the internet and start looking? Did you learn anything from this project that will become a part of your regular creative process? What kind of emotional responses were you trying to evoke in your imagery?

DEMO MATERIALS:
Here is a 10 minute video to get you started with Blockville!

 How To Render: